It’s Spring – A great time to Organize the Garden Shed
With the warmer weather comes a great chance to head outside and enjoy then garden. With the snow gone and tulips and daffodils popping up from the once frozen earth, this is a great time to organize the garden shed and get ready for some digging, planting and blooming oil your garden. An organized shed avoids wasted time looking for trowels and gloves. You will also save money as you get organized; you won’t be repurchasing items that you can’t find.
Uninvited Guests
If your garden is anything like mine, there is a pretty good chance that you have had a few critters decide to bunk in for the winter. Despite our repeated attempts to keep them out, wildlife finds a way in. We’ve had squirrels, skunks, mice and rats over the years. Keep this in mind as you open the latch and get started.
Here are ten tips to help with your project to organize the garden shed.
1 Plan for critters.
Unless you know with absolute certainty there isn’t a critter in the place, assume that there is. Keep yourself safe. Keep the young children away until the critters are gone. Wear gloves and possibly a mask while you figure out if you have had winter guests bunked in.
2 Empty the entire shed.
If at all possible start start by emptying the entire shed. Use a mask and gloves to protect from animal scat, dust and mold. With the shed empty, you will be able to check pots, bins and barrels for those unwelcome guests and plan eviction.
3 Sweep and inspect up and down.
This is a great way to check out the status of the building. Check the floor, corner and side supports while sweeping the floor. Overhead sweep out the cobwebs and check the roof.
4 Review all your tools, shovels, rakes and hoes.
Are there any that are broken, rusted or beyond repair? Throw out the unrepairable and fix what’s needed.
5 Store vertically.
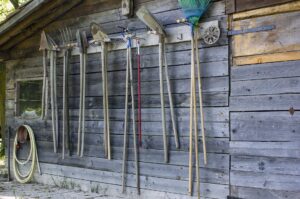
Think vertical and you will find fresh storage space that you may not have realized existed. The rakes, hoes, shovels can be stored on hooks or nails on the walls. Then they will be out of the way and readily available when you are ready to rake. Most hardware stores carry a wide selection of hooks that will suit the purpose. Nails are also good.
6 Contain small tools.
Hang one shopping bag on another hook or nail to hold your digging and planting tools and a separate one for your garden gloves. The cloth recycled plastic bags readily available in stores are a great storage tool. Label with a permanent marker.
7 Store seeds in a rodent safe box.
Store seeds in a plastic or metal box so they are unavailable to rodents. For example, grass and bird seed are major attractions for mice.
8 Check bottles of liquids for leaks.
Review your solution bottles and know your pesticide by-laws. Many jurisdictions have outlawed the use of pesticides. Check with your municipality to see where you can take the pesticides for disposal. Find an environmentally friendly alternative at your local garden centre.
9 Review pots for breaks
Older pots may not have withstood the cold as well as others. Check through your collection for breaks and damage and discard any you don’t use, don’t like or just don’t want. Break damaged clay pots into pieces for use in the bottom of containers and pots. This helps with drainage and avoids water pooling in plant roots.
10 Set up a potting bench.
Now the shed is decluttered and organized, set up a potting bench at one end or side of the shed. You can repot and replant containers even on a rainy spring day. And you and the soil stay dry.
An hour or two spent organizing the garden shed can save time and money later in the spring and summer. Your gardening will be more effective and efficient. All of which adds up to more time to enjoy your blooms and greenery and less time frustrated with garden shed clutter.


Leave a Reply